
For the best IPTV experience, it’s important to choose the right app for your device. Consider your device’s specifications (memory, CPU, etc.) – make sure the app can comfortably handle large channel lists,
If your device struggles with our extensive content, we can help customize your service (for example, by reducing the channel load) to improve performance
Below you’ll find tutorials for setting up IPTV on Smart TVs, streaming devices, smartphones, computers, and more. Let’s get started!
IPTV Smarters Pro is one of the most popular apps for IPTV. Once you have it installed on your device, follow these steps to configure it with your PureHD IPTV subscription:
Launch the IPTV Smarters Pro app and click “Add New User”. This is how you’ll create a profile for your IPTV subscription.
You can log in either by using an M3U playlist URL or by entering your Username, Password, and Server URL (this is the Xtream Codes API method), Use the login details from the welcome email we sent you – it contains your personal username, password, and server portal URL.
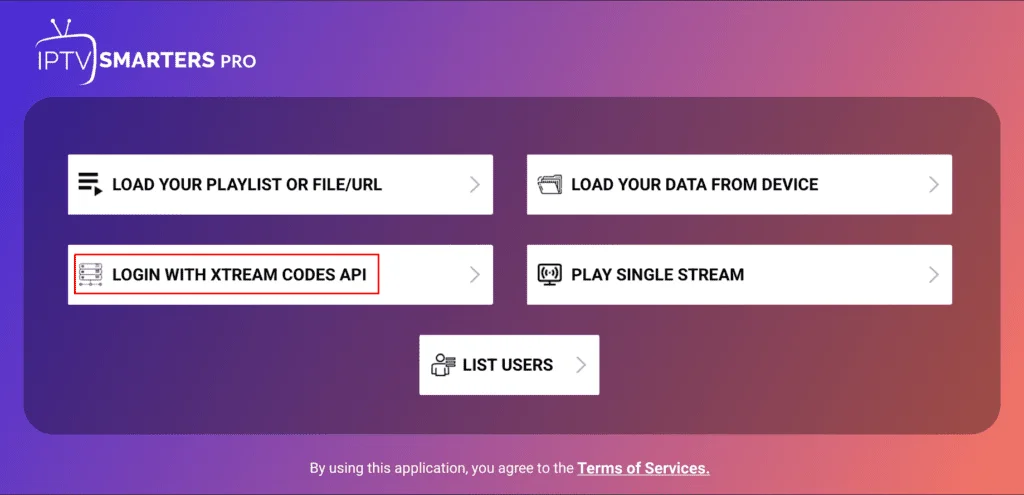
Use the login details from the welcome email we sent you – it contains your personal username, password, and server portal URL.

After logging in successfully, the app will take you to the Users list. Click on the new user/profile you just created to load your channels.
Congratulations! You have now set up the IPTV Smarters Pro app and your channels should begin loading. You’re ready to enjoy streaming Live TV and VOD on IPTV Smarters Pro.
Instructions for setting up IPTV on Samsung, LG, or Android Smart TVs:
IBO Player Pro – Highly recommended (easy to set up)
IPTV Smarters Pro – Highly recommended (easy to set up; choose “Xtream Codes API” in app)
Duplex Play
Flix IPTV
SET IPTV
ELK Player
Nanomid
Smart IPTV (often listed as **“Smart IPTV” app)
Smart STB
STB Emulator
To check if your TV uses Android TV, see if it has the Google Play Store. Samsung (Tizen OS) and LG (WebOS) Smart TVs use their own app platforms, but you can still install IPTV apps via their app stores or via a USB/Downloader method when necessary.
After installing one of these apps on your Smart TV, open it and choose the Xtream Codes login/API option (if applicable). Then enter the subscription details (Server URL, Username, Password or upload your M3U playlist) that we provided to you via email to log in, Once connected, your channel list will load on the TV.
If you encounter any issues on a Smart TV, please contact our support team (for example, via WhatsApp) for help. We can assist with setting up your subscription in the app.
Follow these steps to install and set up IPTV Smarters Pro on an Amazon Fire TV Stick (Firestick) device:
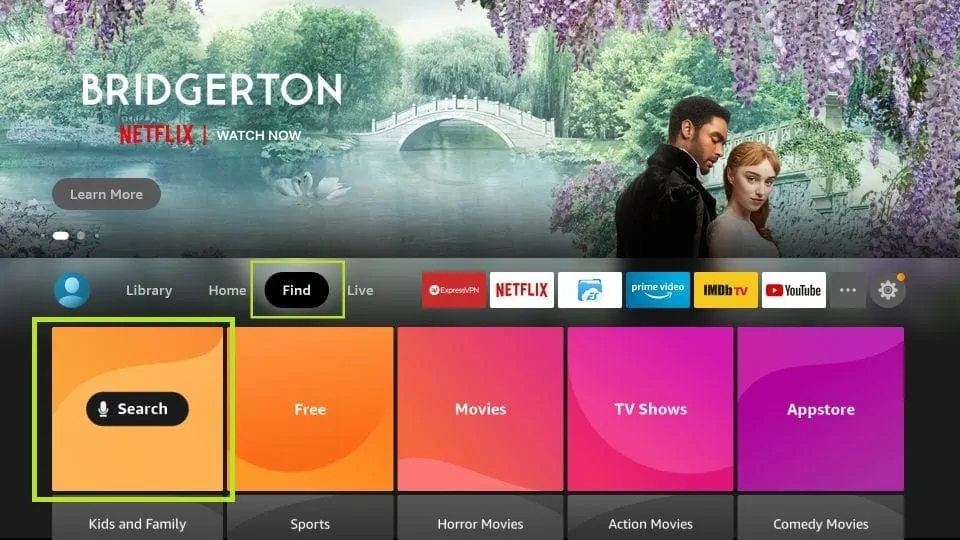
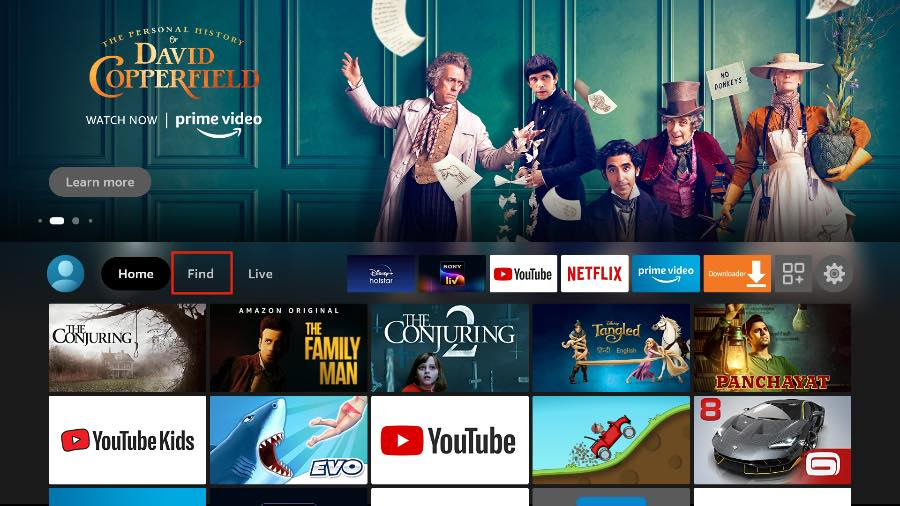
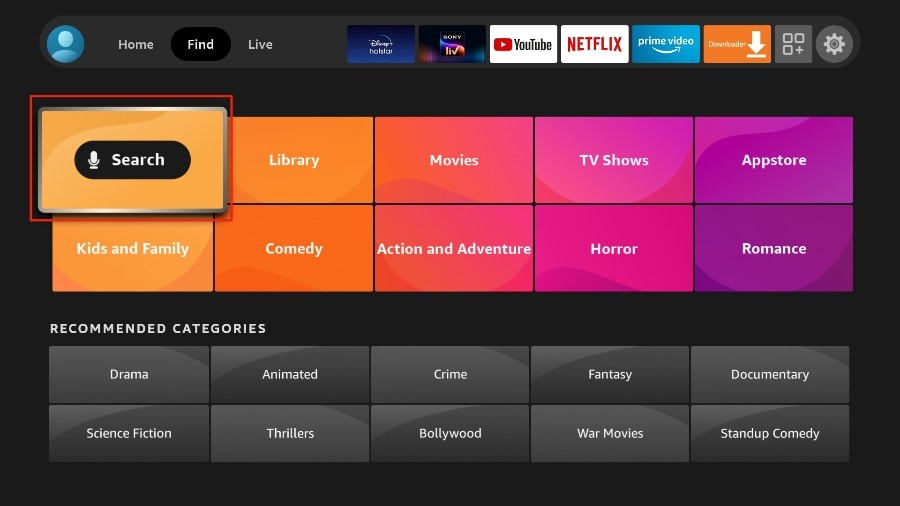
On your Firestick Home screen, go to Find > Search.
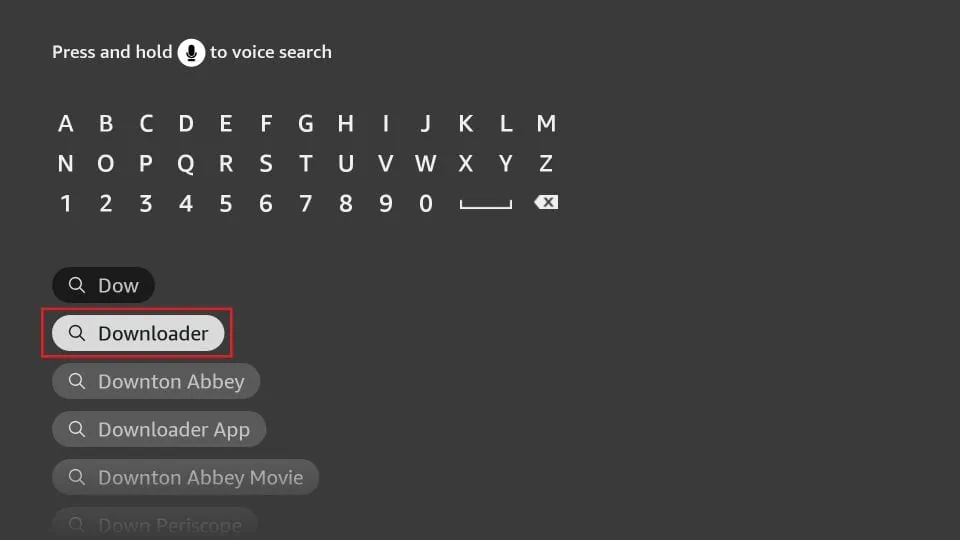
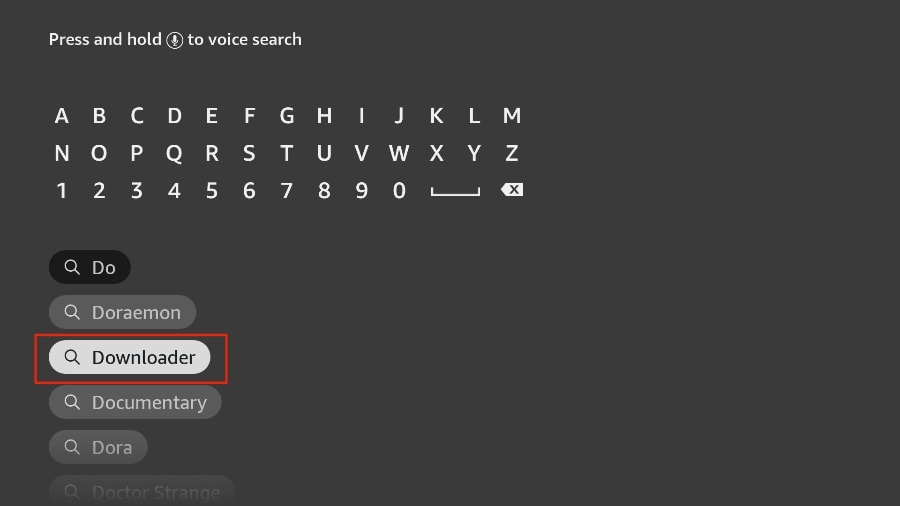
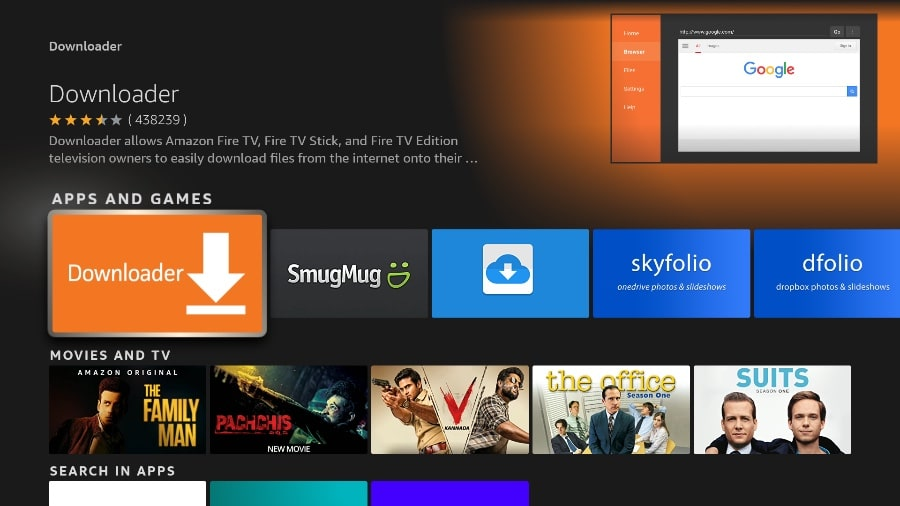
Using the on-screen keyboard, search for “Downloader” – this is an app that will allow us to sideload IPTV Smarters (since direct browser downloads are not allowed on Firestick), Select the Downloader app (orange icon) from the results and press Download/Get to install it.
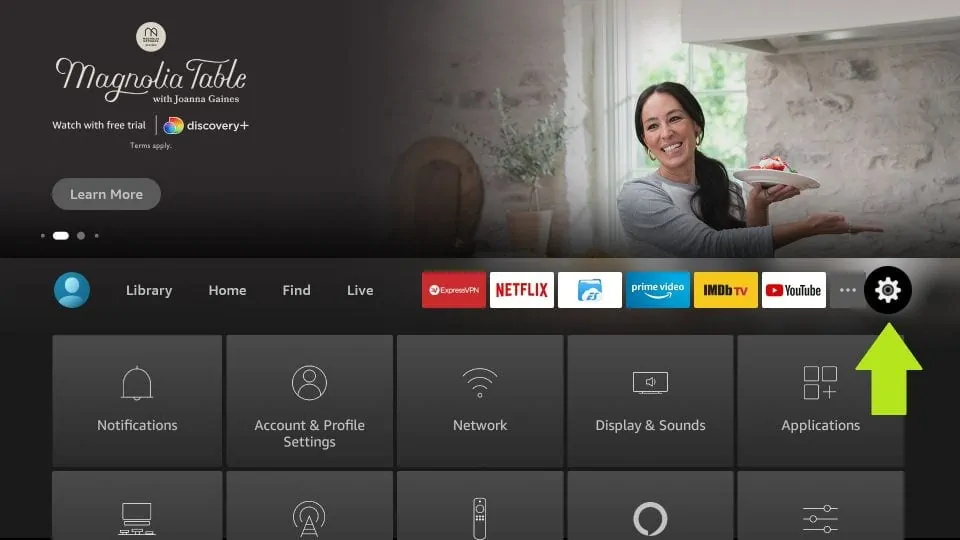
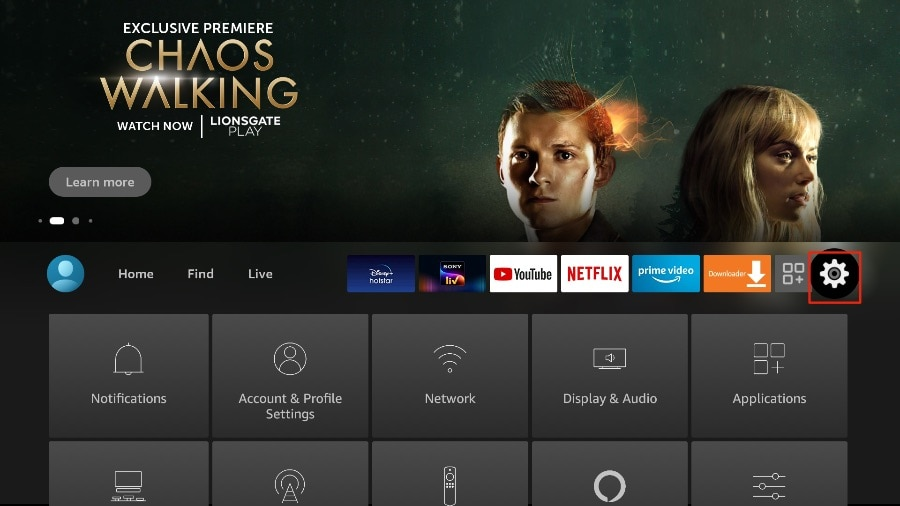
After installing Downloader, return to the Firestick home screen. Navigate to the Settings gear icon on the far right.
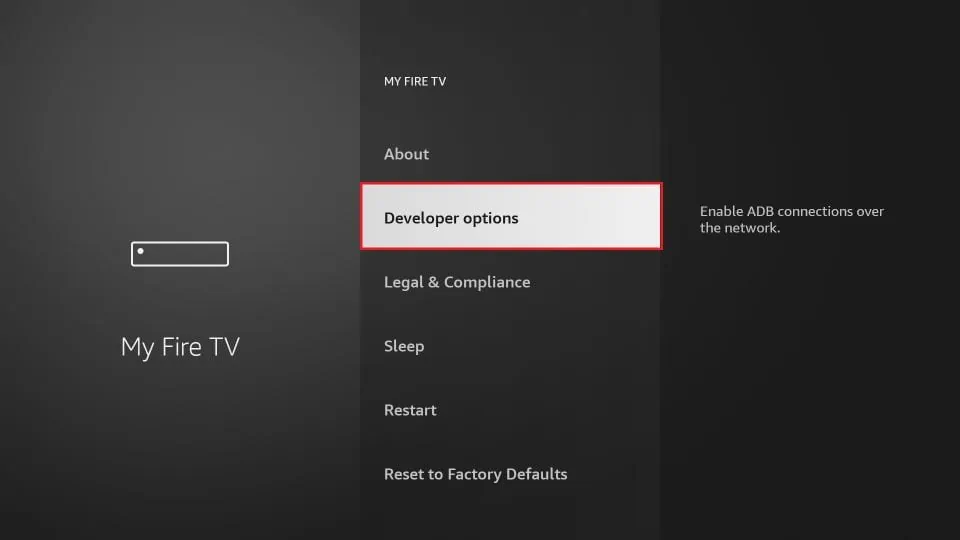
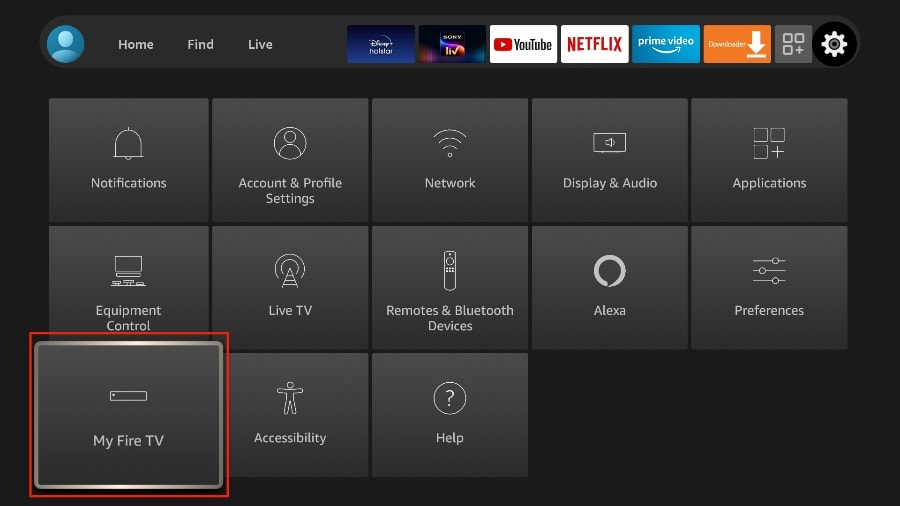
In Settings, go to “My Fire TV”.

Then select “Developer options.”.
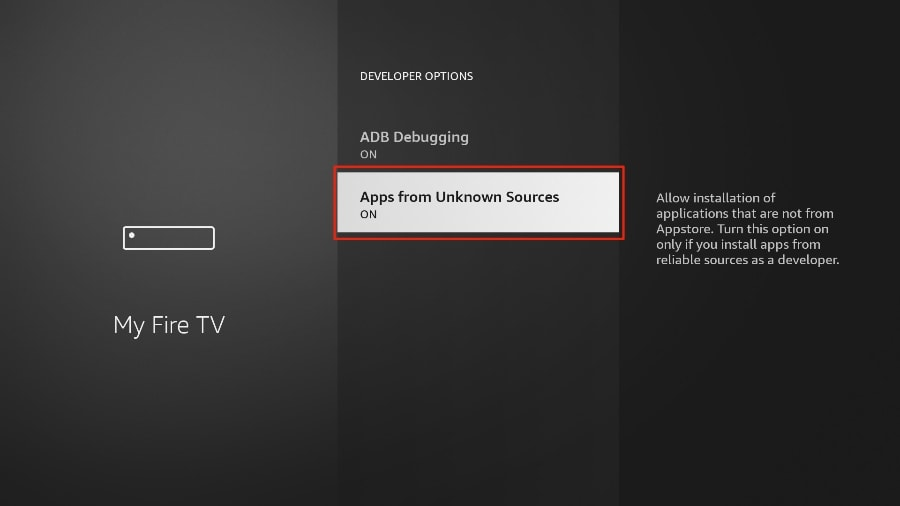
Under Developer options, find “Install Unknown Apps” (or “Apps from Unknown Sources”).
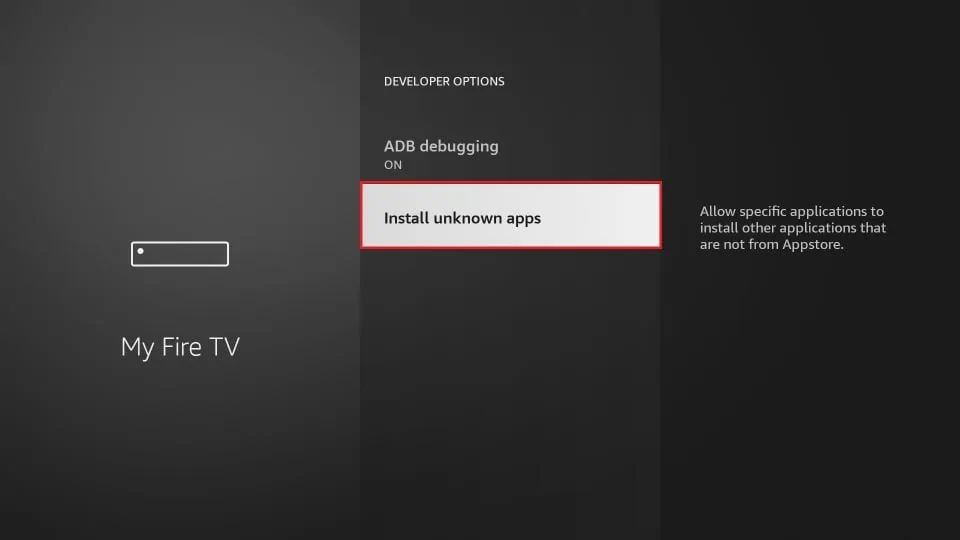
Make sure it is turned ON for the Downloader app.
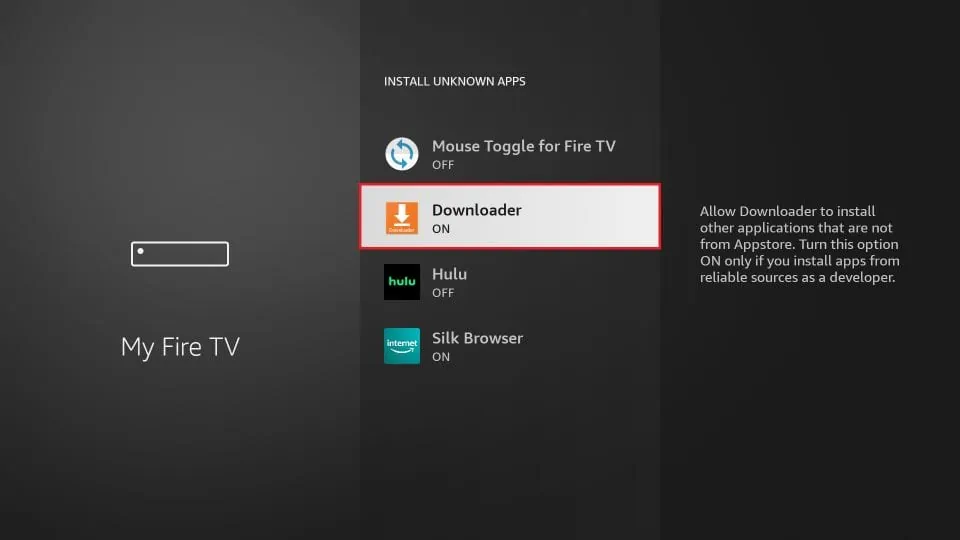
This configuration allows you to install apps from outside the Amazon Appstore (like the IPTV Smarters APK).
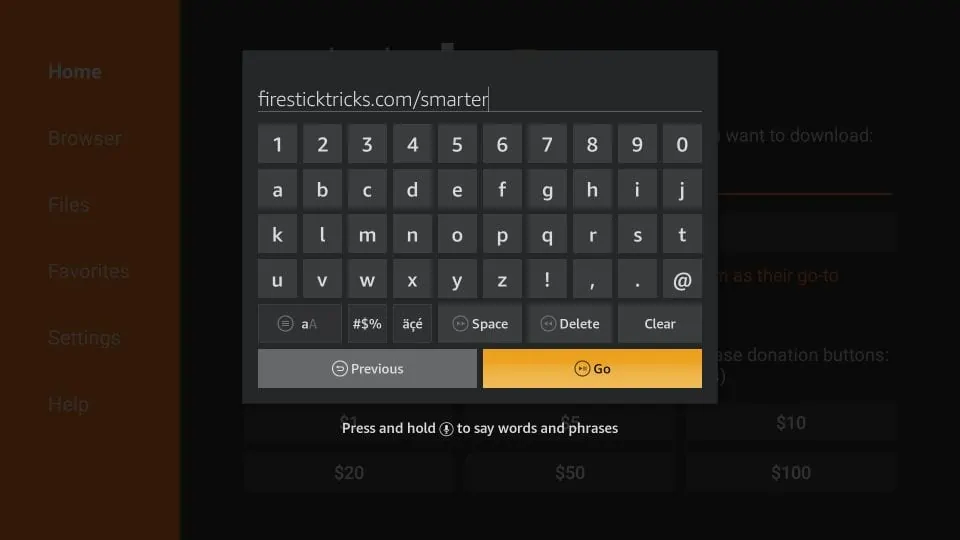
Open the Downloader app on the Firestick, On first launch, you might need to dismiss some prompts. You will see a Home screen with a URL input field. Click on the URL field that shows http://
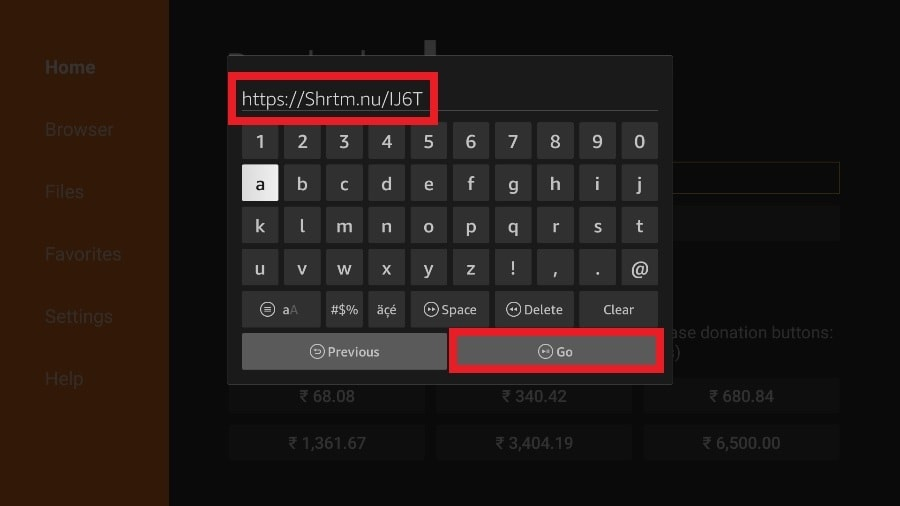
In the URL field, type the download link for the IPTV Smarters app: https://www.iptvsmarters.com/smarters.apk
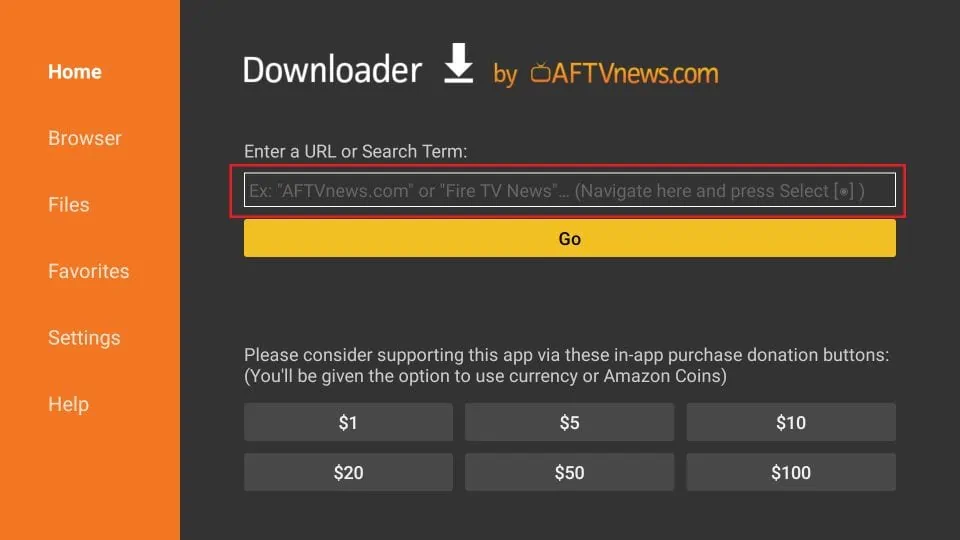
Then click “Go” (or “OK/Play” to proceed).
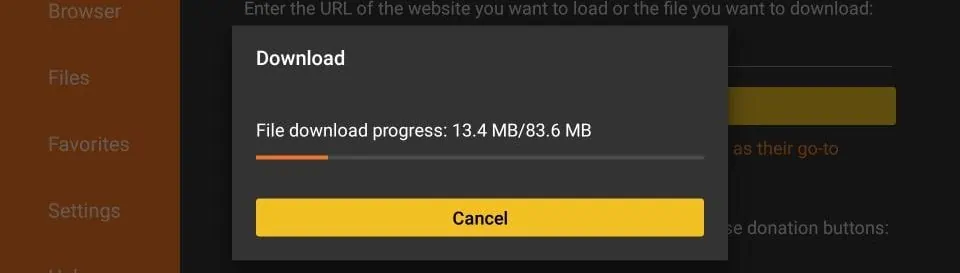
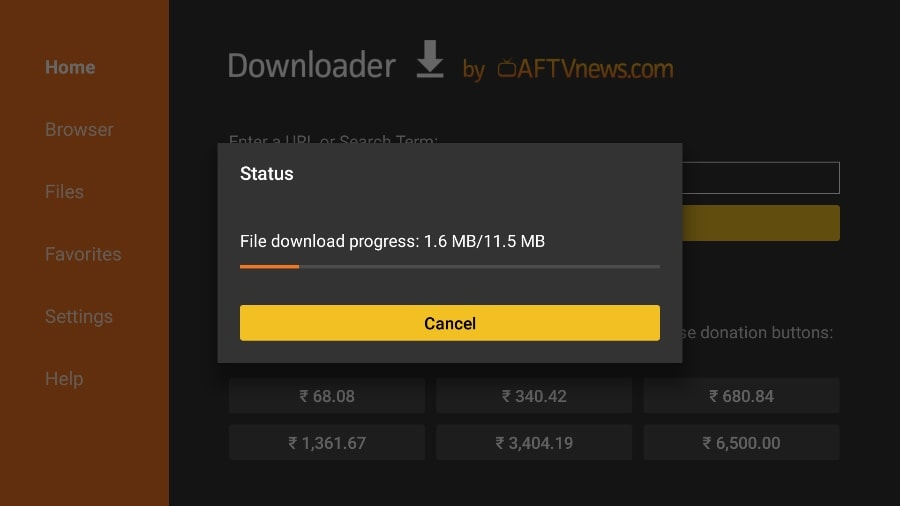
Downloader will connect and begin downloading the IPTV Smarters Pro APK file to your Firestick. This may take a minute or two, depending on your internet speed.
Wait for the download to complete.
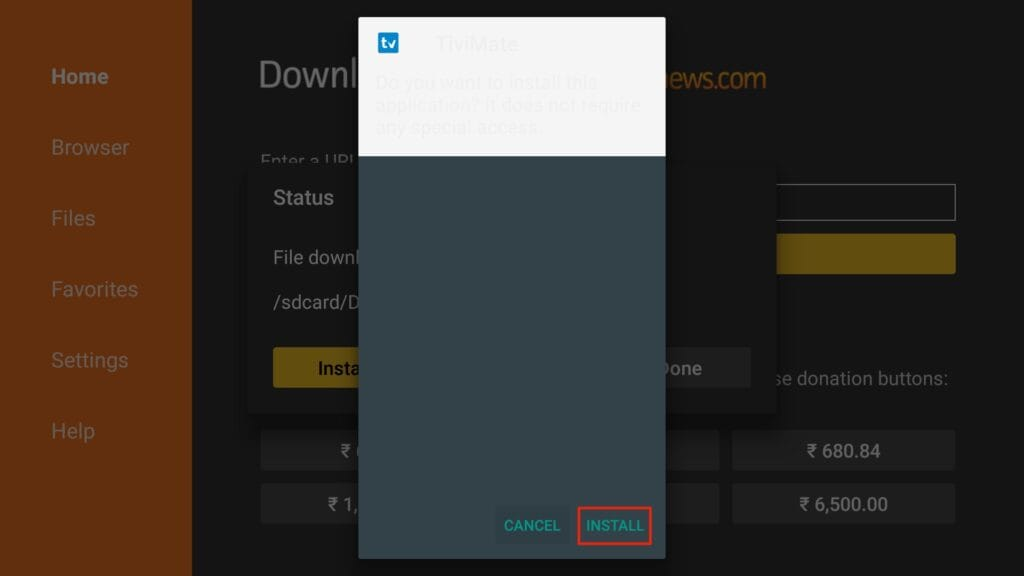
Once the APK download is finished, Downloader will automatically prompt you to install the app. Click “Install” when you see the installation screen, The Firestick will install the IPTV Smarters app.

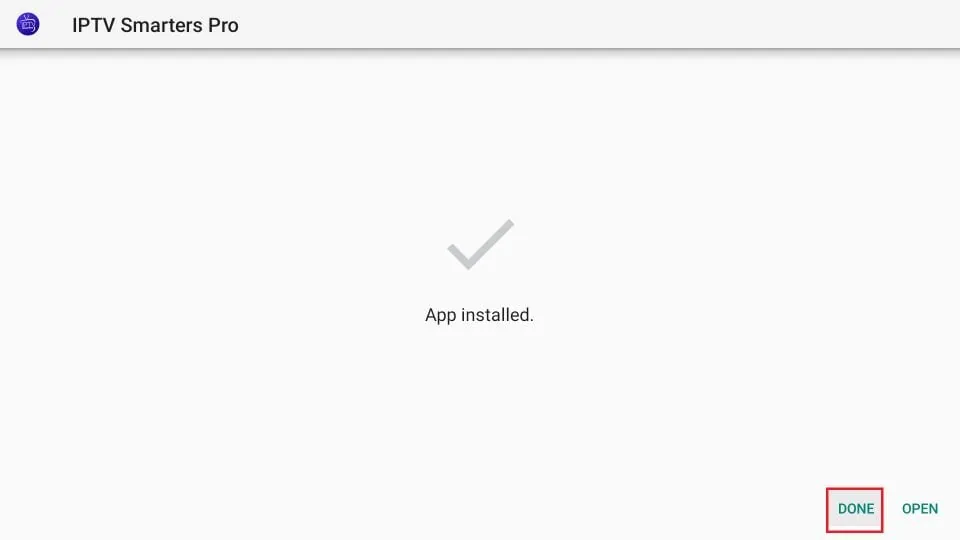
The app will take a few moments to install. When you see the “App Installed” confirmation on your screen, the installation is complete.
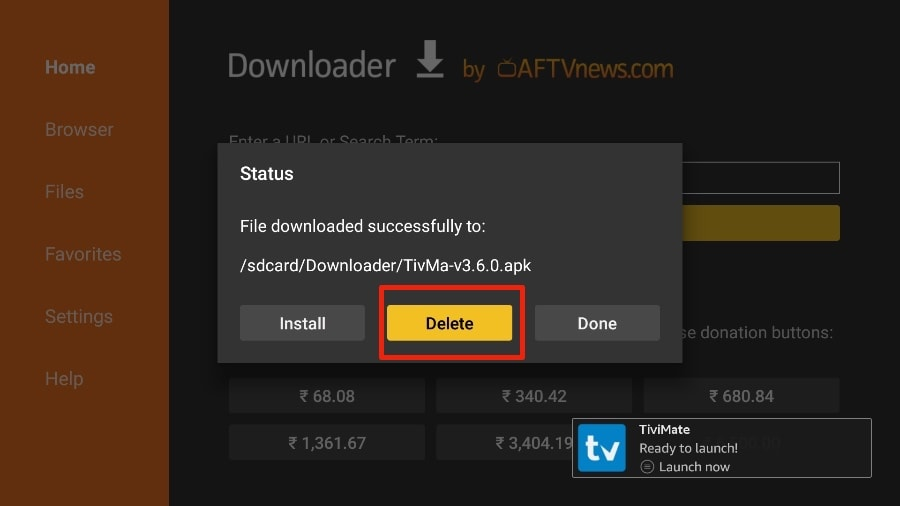
You can now either click “Open” to launch the app immediately, or click “Done.” We recommend clicking “Done” first, so we can delete the APK file and free up Firestick storage.
Deleting the APK is safe – you’ve already installed the app, and removing the leftover file will save space on your Firestick.
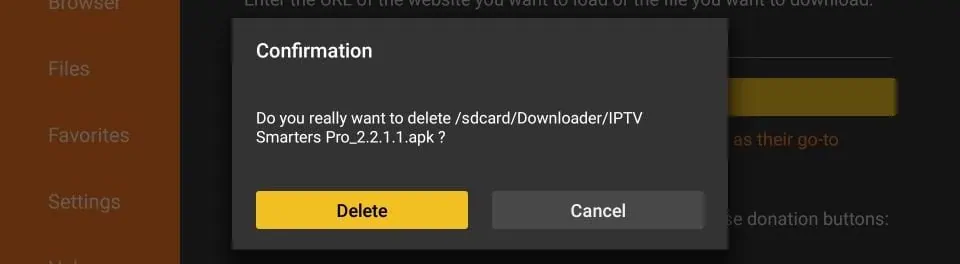
then confirm by selecting “Delete” again when asked.
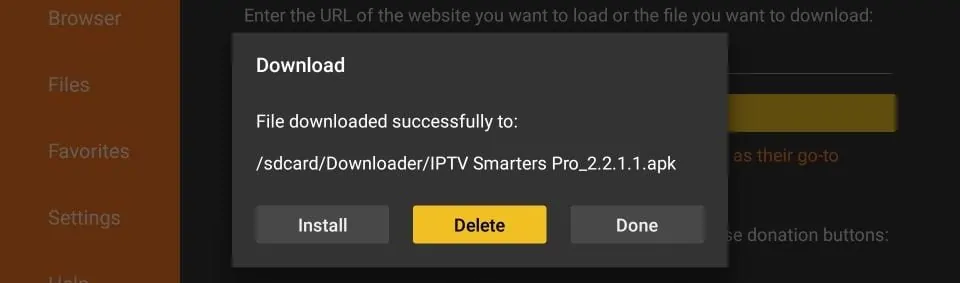
After clicking “Done,” you’ll be taken back to the Downloader interface. It will prompt to delete the Smarters APK file. Select “Delete” to remove the installation file.
Great! You now have the IPTV Smarters app installed on your Firestick.
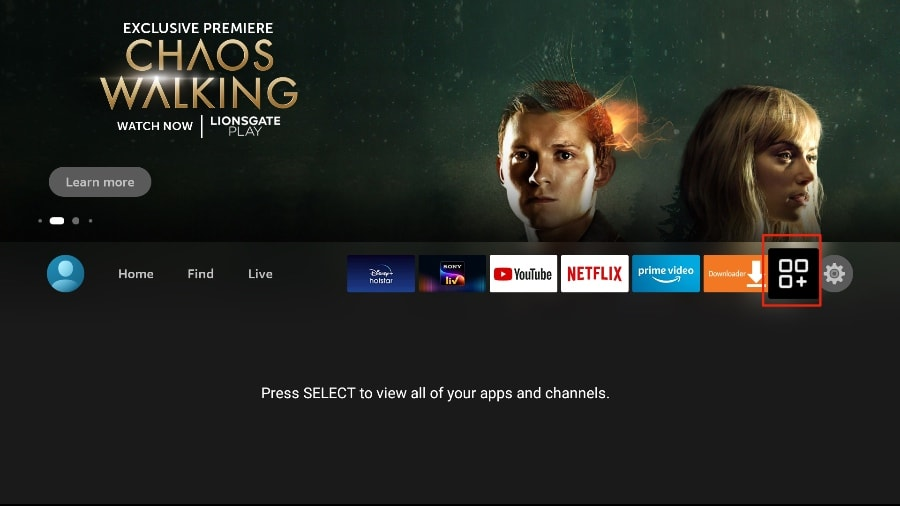
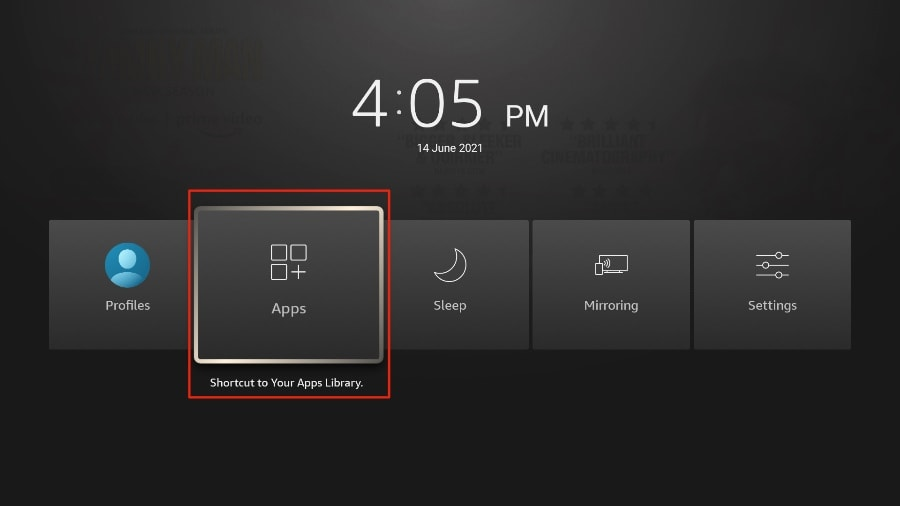
Go to Your Apps & Channels on the Firestick (you can press and hold the Home button on your remote and choose Apps to find it quickly). Launch IPTV Smarters Pro, log in using the steps in the “Setting Up IPTV Smarters Pro” section above, and start enjoying your IPTV service on the big screen.
(If you run into any issues during installation or setup on the Firestick, contact our support team for help.)
For Apple iOS/tvOS devices, you will need to install a compatible IPTV app from the App Store (since sideloading is not applicable on iPhone/iPad/Apple TV). We recommend one of the following iOS apps:
IBO Player – Highly recommended (very easy to set up)
IPTV Smarters Pro – Highly recommended (easy to set up; choose Xtream Codes login)
GSE Smart IPTV – (Use Xtream Codes API login method)
ELK Player
After installing your chosen app from the App Store, open it and select the Xtream Codes API or M3U Playlist option to log in. Use the subscription credentials (Server URL, Username, Password or M3U link) we provided via email to add your profile and load channels.
If you have any trouble on iOS or Apple TV, please contact our support (e.g. via WhatsApp) – we’ll help you set up your subscription in the app.
On Android-based devices (Android phones, tablets, Android TV boxes, Nvidia Shield, etc.), you can install any of the recommended IPTV apps from the Google Play Store:
IBO Player – Highly recommended (easy to set up)
IPTV Smarters Pro – Highly recommended (easy to set up; use Xtream Codes API login)
Duplex Play
Flix IPTV
SET IPTV
ELK Player
Nanomid
Smart IPTV (or Smart IPTV app)
Simply open the Google Play Store on your Android device and search for one of the above apps, Install the app, then use the login details from your PureHD subscription (Xtream Codes server URL, username/password or your M3U playlist URL) to sign in and load channels
If you encounter issues on Android devices, contact our support team – we can assist you to get the app configured with your subscription.
You can enjoy IPTV on your Windows PC or Mac as well. We suggest the following software options for computers:
IPTV Smarters Pro – Desktop app (login via Xtream Codes API)
Kodi – Media player with IPTV add-on support
VLC Media Player – Simple option to play M3U playlists
The easiest method for PC/Mac is using VLC with your M3U link:
Step 1: Download and install VLC media player on your computer (if not already installed). You can get it from the official website (videolan.org).
Step 2: Open VLC Player on your PC/Mac. In the menu, go to Media -> Open Network Stream.
Step 3: Enter your M3U URL (the playlist link provided in your subscription email) into the network stream URL field, then click “Play.”
Step 4: Wait a minute or two for all the channels to load into VLC (it may take some time if there are many channels). Once loaded, you can browse and select any channel from the playlist.
Step 5: Enjoy the show! Select a channel in VLC and start watching Live TV on your computer. You can also use VLC’s playlist view to switch between channels.
If the M3U playlist doesn’t load or you experience issues (e.g. some channels not playing), try restarting VLC and loading the link again. You can also contact our support via WhatsApp for help – we’ll assist in setting up your subscription on VLC or troubleshoot any playback problems.
The STB Emulator app allows you to emulate a MAG set-top box on Android devices (TV boxes or even Android TVs). It’s useful if you prefer the classic MAG box interface. This tutorial will guide you through setting up STB Emulator:
Step 1: Install the STB Emulator app from the Google Play Store. (Search for “STB Emulator” – it’s published on Play Store. There are free and pro versions; the free version is sufficient to start.)
Step 2: Open the STB Emulator app after installation. On the first launch, it will display a screen with a MAC address for your emulated device – note this down or keep the screen open.
Step 3: Access the menu. Tap near the top-right corner of the app screen, then click “Settings” (it’s the fourth icon from the right in the top menu bar).
Step 4: In Settings, select “Profiles.” Then select the default profile (often named “Test Portal”) to edit it, or choose “Add Profile” to create a new one.
Step 5: Under the profile settings, tap “STB Model.” Choose MAG 250 (or whichever MAG box model you want to emulate from the list). MAG 250 is a common choice that works well for most services.
Step 6: Next, tap “Portal Settings.” In Portal settings, select “Portal URL.” Enter the Portal URL for our service (you can find this in your activation email from us). This URL is what the MAG box uses to connect to our servers. After entering the URL, press OK to save.
Step 7: Still in Portal Settings, you may also set a Portal Name (optional – for example, “PureHD IPTV”) for your reference. If our service is the only one you use, you can leave Portal 2 empty. (If you ever have a second subscription, Portal 2 is where you’d add another URL).
Step 8: Now, go back to the main Settings menu and find “Screen Resolution.” Set it to 1280×720 for best compatibility. (You can choose a higher resolution like 1920×1080 if your internet speed is above ~16 Mbps for smoother 1080p streaming.)
Step 9: All set! Exit the app (close it completely), then relaunch the STB Emulator app.
Step 10: The app should now load up the portal you configured. You’ll see the channel list/menu appear, just like it would on a MAG set-top box. From here, you can navigate channels and watch TV using the MAG interface.
If you experience issues with channels not playing on STB Emulator, try these steps: restart the app, restart your device/box, and even reboot your Wi-Fi router. Often, a fresh restart resolves streaming issues. If problems persist, contact our support team via WhatsApp – we can help ensure your subscription is set up correctly in the STB Emulator.
If you have an actual MAG set-top box (e.g., MAG-250, MAG-254, MAG-256, etc.), you can connect it directly to our service by configuring the portal URL. Here’s how to set up a MAG box:
Connect your MAG box to your TV and network (Ethernet or Wi-Fi). Power it on.
On the MAG box menu, go to Settings -> System Settings -> Servers -> Portals.
In the Portal 1 name field, enter a name of your choice (for example, PureHD or IPTV Service).
In the Portal 1 URL field, enter the Portal URL provided in your subscription activation email. Double-check that you type the URL exactly as given.
Leave Portal 2 name and URL empty (unless you have a second subscription with another service – in that case you could add a second portal here).
Save/OK the settings to exit.
Now reboot the MAG device: go back to System Settings and choose “Reboot Portal” (or simply restart the box).
The MAG box will restart and load the portal. Wait for it to finish loading (this may take a minute).
You should see the channel list or IPTV main menu appear on your screen once the portal loads fully. You can now select channels and start watching!
If you encounter any issues with MAG setup (e.g., portal not loading or portal blocked), contact our support team. We will help get your MAG box connected to the service.
Unlike other devices, Roku doesn’t support direct installation of most IPTV apps from its Channel Store. However, we can use a workaround by sideloading the IPTV Smarters app onto Roku using the Developer Mode. This sounds complex, but we’ve broken it down into four parts to make it easier:
Part 1: Activate Developer Options on Roku
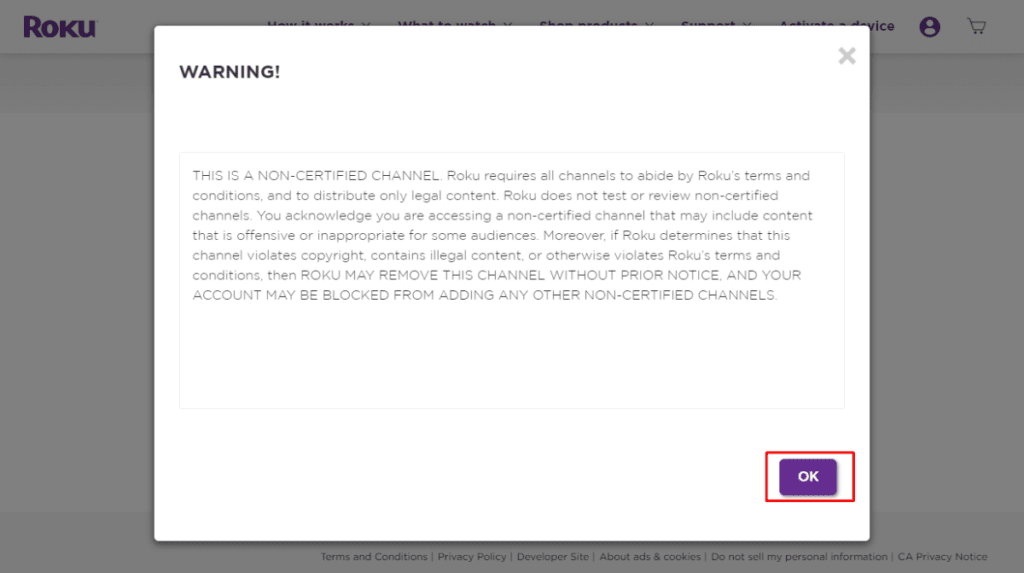
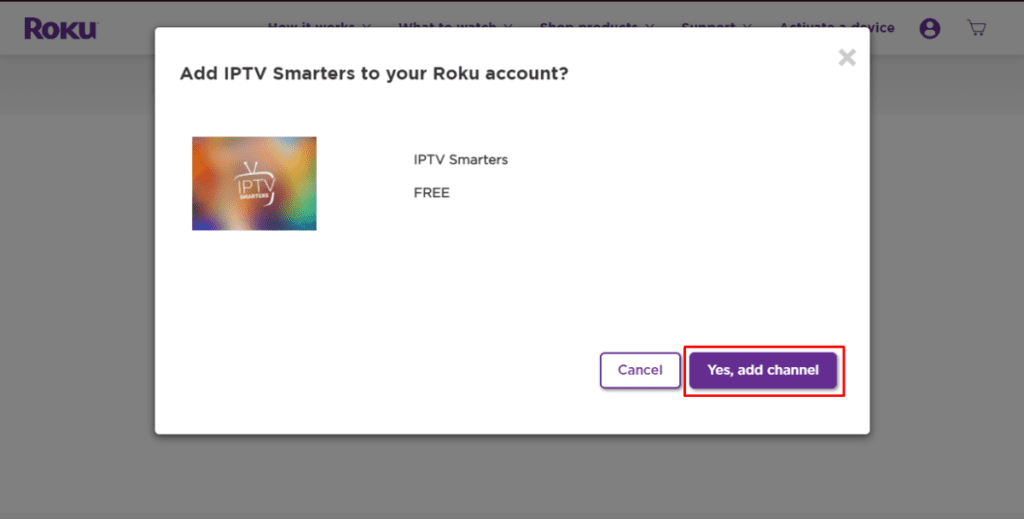
Part 2: Add the IPTV Smarters “private channel” (non-certified channel) to your Roku account
Part 3: Download the IPTV Smarters package onto your computer
Part 4: Install IPTV Smarters on Roku through the web interface
No worries – the process is simpler than it looks. Let’s begin!
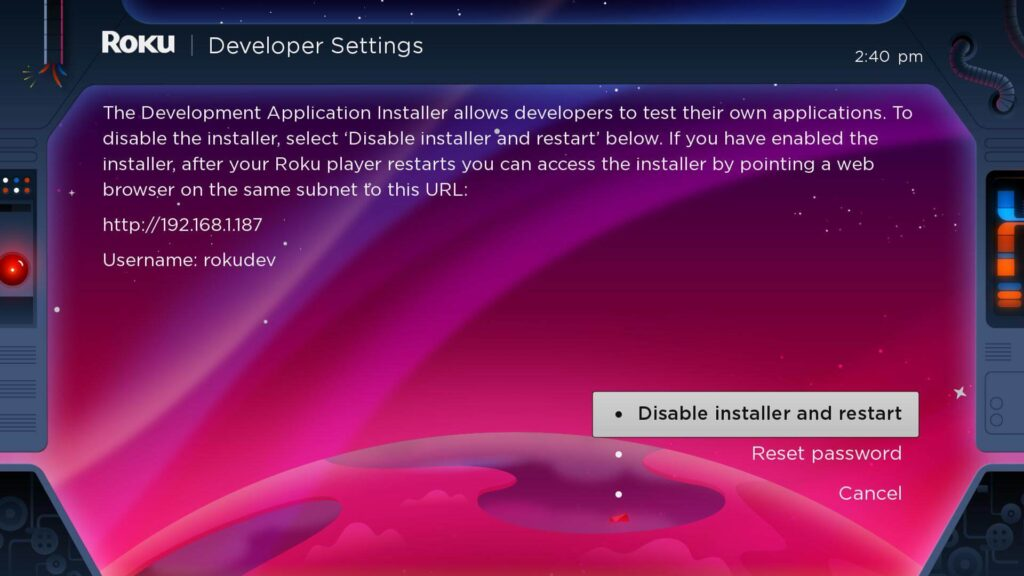
Enable Developer Settings: Turn on your Roku and make sure it’s on the home screen (TV input set to Roku). Using the Roku remote, press the following sequence of buttons in order:
Home button (press 5 times quickly) -> Fast Forward (press 3 times) -> Rewind (press 2 times).
If done correctly, the Developer Options menu will appear on your Roku screen.
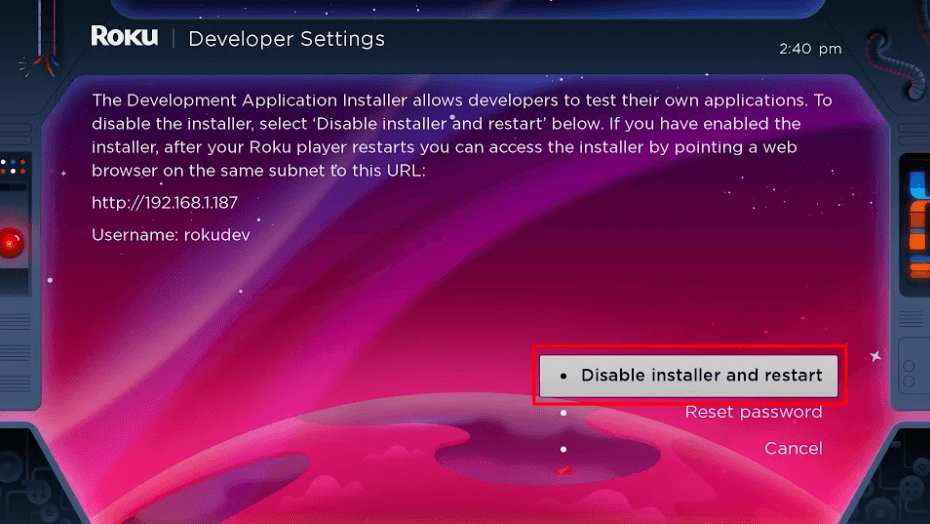
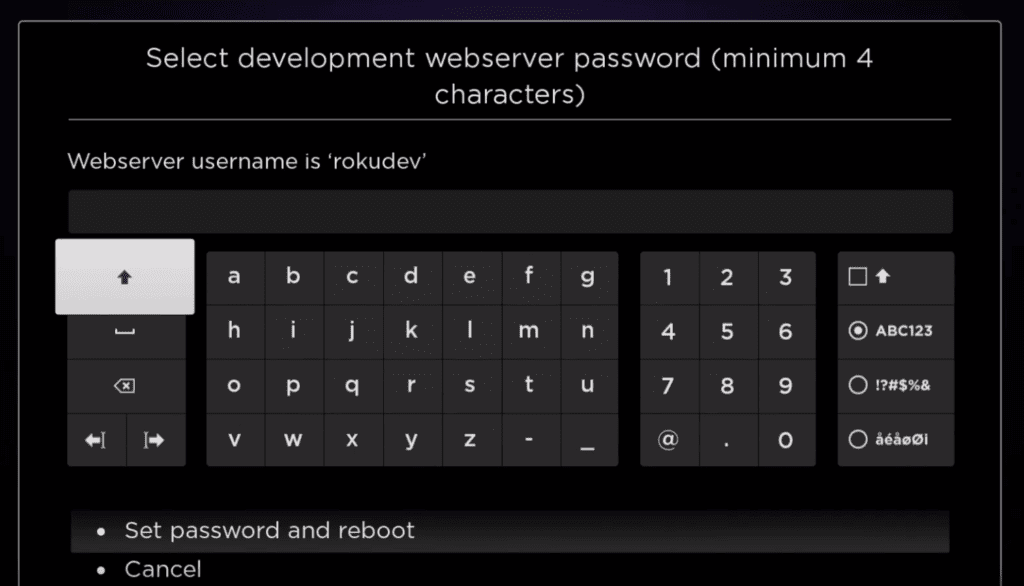
Set a Dev Mode password: You’ll be prompted to create a web server password for the Roku’s developer web interface. Use the on-screen keyboard to enter a secure password (and remember it – you will need this password soon).
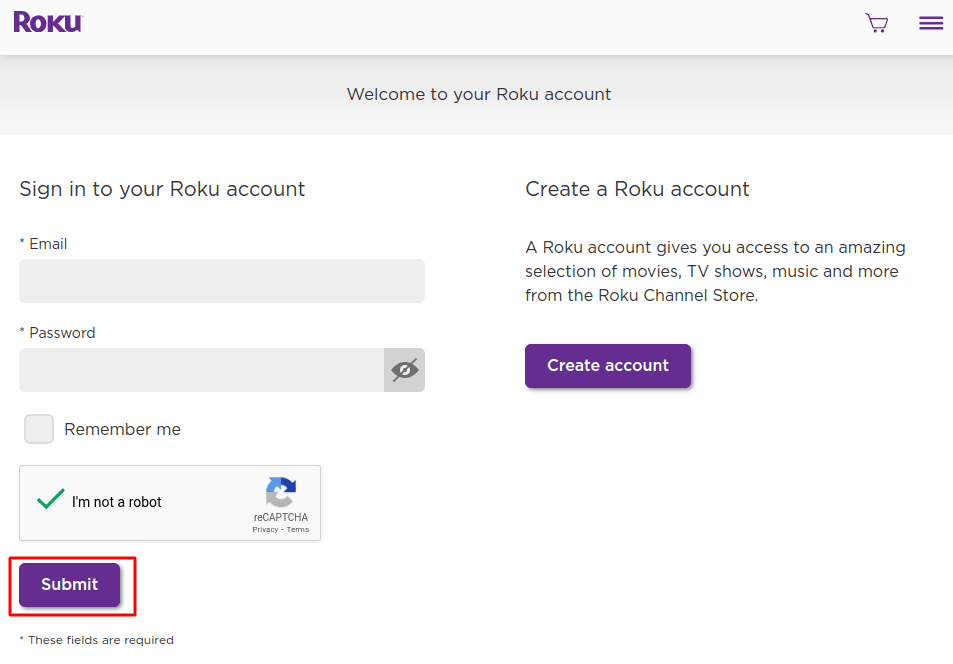
Go to Roku’s website: On your computer, open a web browser and visit my.roku.com. Log into your Roku account with your Roku email and password.
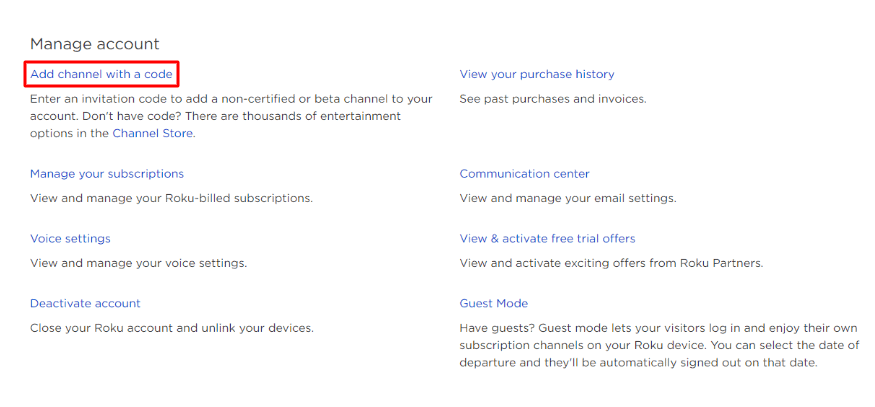
iptvsmarters as the channel access code (all lowercase, no spaces). Then submit it.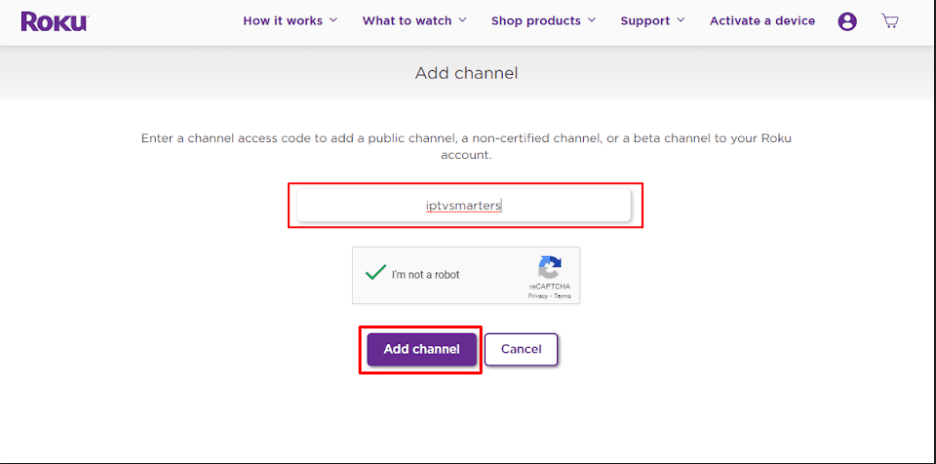
Now we need the actual app package (a ZIP file) to upload to the Roku.
https://www.whmcssmarters.com/clients/dl.php?type=d&id=108 . (The download should start automatically when you visit that URL.) Save the file (it should be a ZIP file containing the app) to an easy-to-find location on your PC, for example your Desktop. 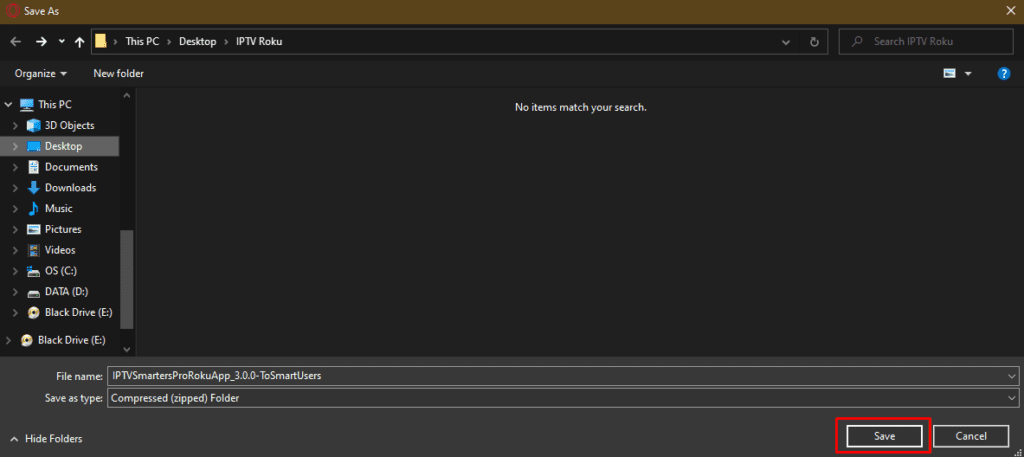
This APK/ZIP file is provided by the app developers (WHMCS Smarters). We are not hosting this file ourselves, but providing the official link where it’s hosted.
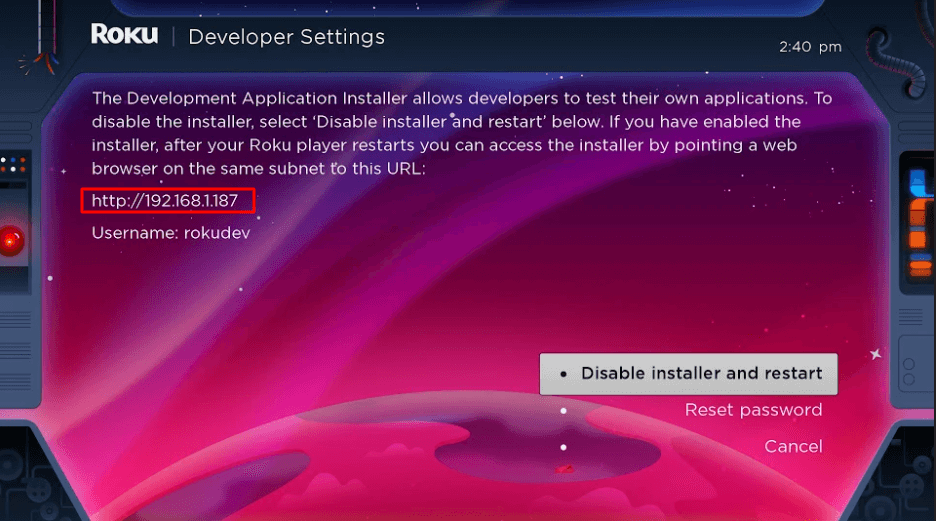
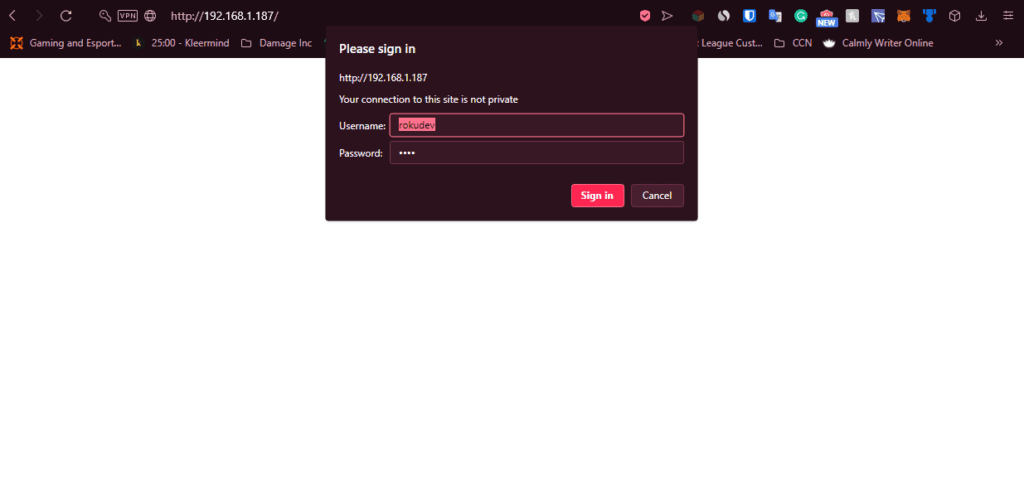
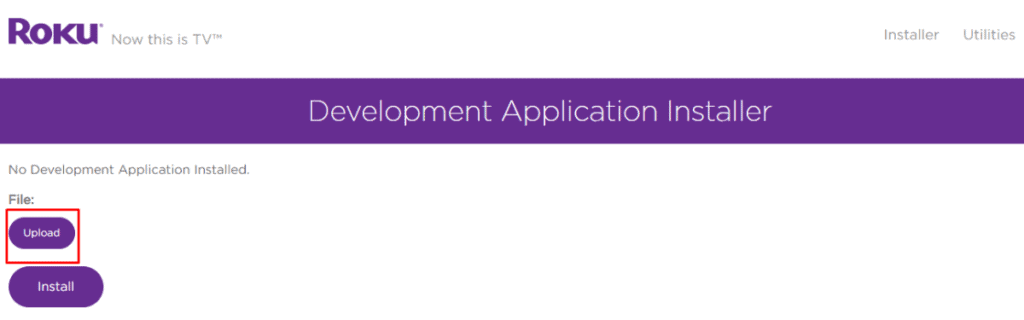
Open Roku’s Dev Web Interface: On your computer, open a web browser and go to http://ROKU_IP_ADDRESS (replace “ROKU_IP_ADDRESS” with the actual IP you noted from the Roku screen). For example, if your Roku’s IP was 192.168.1.100, enter http://192.168.1.100 in the browser. You should see a Roku Developer web interface login page.
Log in to Developer Mode: The browser will prompt for username and password. Use rokudev as the username (this is fixed for all Roku devices), and enter the password you created in Part 1, step 5. Then click “Login.” (Image: Roku Developer Mode web login with “rokudev” as username)

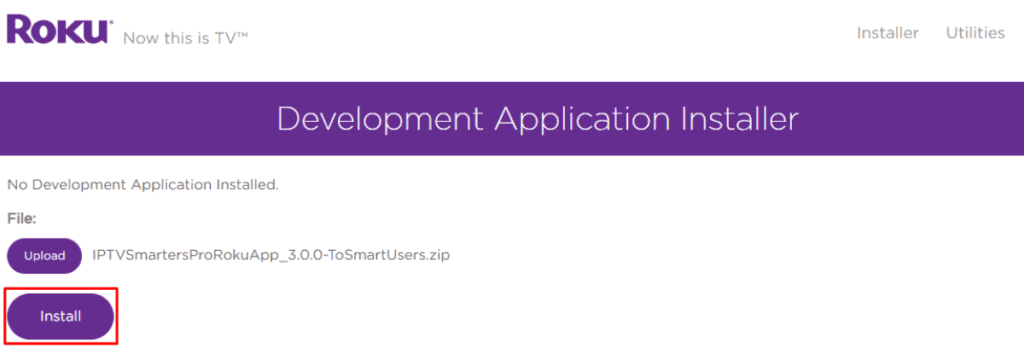
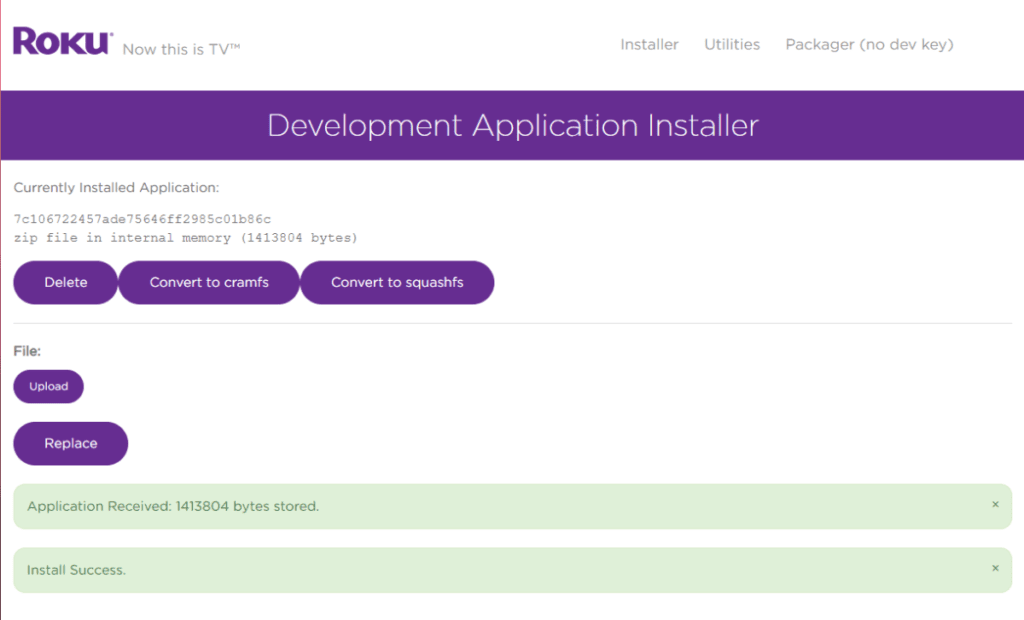
Install the app: Once the ZIP file is uploaded, click the “Install” button on the web interface. The Roku will install the IPTV Smarters app package. You should see a message that the installation was successful.
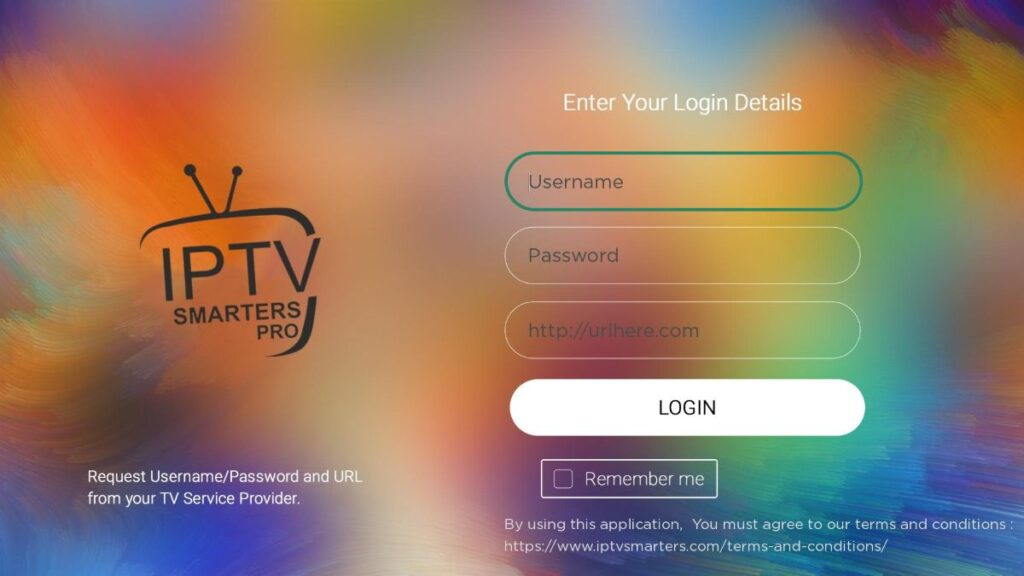
Login on Roku: When IPTV Smarters opens on Roku, you’ll be prompted to log in (just like on other devices). Enter your Username, Password, and Server URL for PureHD IPTV. After inputting your credentials, sign in and the app will load your channels.
All done! You have successfully installed IPTV Smarters on Roku via Developer Mode. From now on, you can launch the IPTV Smarters channel on your Roku to watch Live TV and VOD. Enjoy!
All done! You have successfully installed IPTV Smarters on Roku via Developer Mode. From now on, you can launch the IPTV Smarters channel on your Roku to watch Live TV and VOD. Enjoy!
Alternatively, you can cast or mirror IPTV from another device to Roku. If you don’t want to go through the sideload process above, you can install IPTV Smarters or another IPTV player on your smartphone and use the Roku’s screen mirroring (casting) feature. Ensure your phone and Roku are on the same Wi-Fi network, then use the Cast/Mirror option on your phone (in the IPTV app or in system cast settings) to send video to the Roku. This is an easy way to watch IPTV on Roku without installing any channel – the Roku will display whatever is playing on your phone’s IPTV app.
Sony Smart TVs either run Android TV or the newer Google TV operating system (depending on model/year). Both platforms have access to the Google Play Store, so the installation process for IPTV apps is similar to other Android TVs. There are three main ways to install an IPTV app on a Sony Smart TV:
Open Google Play Store: Power on your Sony Smart TV and navigate to the Apps section on the home menu. Select the “Google Play Store” app.
Search for IPTV app: In the Play Store, use the search function (magnifying glass or search bar) and enter the name of the IPTV app you want (for example, “IPTV Smarters Pro”, “TiviMate”, or any app from the recommended list).
Select the app: Find the IPTV app in the search results and select it.
Install the app: Click the “Install” button on the app’s store page. The app will download and install on your TV.
Launch the app: Once installation is complete, open the new IPTV app (it will appear in your Apps list).
Enjoy streaming: Login or upload your playlist in the app as required, then start streaming live channels on your Sony Smart TV!
This method is straightforward, but note that not all IPTV apps may be available in the Play Store due to Google’s policies. If you cannot find your desired app, proceed to Method 2 or 3.
If the IPTV app you want isn’t in the Play Store (many aren’t), you can sideload it using the Downloader app:
Install Downloader: On your Sony TV, go to Apps and open the Play Store. Search for “Downloader” app (by AFTVnews). Select Downloader from suggestions and install it. This app will help download APK files.
Enable unknown sources: After installing Downloader, go back to the TV Settings. Navigate to Device Preferences (or Security on some models) > Security & Restrictions > Unknown Sources. Find Downloader in the list and turn it ON (allow it to install apps from unknown sources). This permission is necessary for sideloading.
Download the IPTV app APK: Launch the Downloader app on the TV. In Downloader’s URL field, enter the direct download link for the IPTV app’s APK file (you may need to find this link from the provider’s website or a trusted source). For example, to get IPTV Smarters, you might enter the URL provided by its official site. Then press “Go.”
Install the app: Downloader will fetch the APK file. Once downloaded, it should prompt you to install it. Choose “Install” when prompted.
Launch the IPTV app: After installation, you can open the app right away or find it later in your Apps list. Log in with your PureHD IPTV credentials or load your M3U playlist to start streaming.
Another sideloading option is to use a computer and USB flash drive:
Download APK on PC: On your computer, search for the IPTV app’s APK file (e.g., Google “AppName APK download”) and download it from a trusted website. Ensure you get the latest version and that the source is reputable.
Transfer to USB: Insert a USB flash drive into your computer. Copy the downloaded IPTV APK file onto the USB drive. Once copied, eject the USB drive from your PC.
Plug into TV: Insert the USB drive into a USB port on your Sony Smart TV. The TV may detect the drive automatically.
Enable unknown sources: As in Method 2, make sure unknown sources are enabled for installing apps on your TV (check Settings > Security & Restrictions > Unknown Sources, allow it).
Locate the APK on TV: Using your TV’s file manager or a USB browsing feature, find the APK file on the USB drive. (On some Sony TVs, you can use the pre-installed “File Commander” app or a similar file explorer to navigate the USB storage.)
Install the app: Select the APK file on the TV and you should be prompted to install it. Choose “Install” and wait for the app to be installed on the TV.
Launch and enjoy: After installation, open the new IPTV app from your Apps menu. Enter your login details or playlist to start streaming content on your Sony TV.
All done – you can now watch IPTV on your Sony Smart TV using whichever app you installed!
Besides IPTV Smarters, another popular app for streaming IPTV is TiviMate (especially on Android-based devices like the Firestick). TiviMate offers a sleek interface and advanced features for IPTV. Below we’ll install TiviMate on a Firestick. (If you followed the earlier IPTV Smarters on Firestick guide, you’ll notice some steps are similar.)
Please follow the three parts below to get TiviMate set up on your FireStick.
Go to FireStick Home: Turn on your FireStick and ensure you’re on the home screen.
Navigate to Find: Select the “Find” menu, then click “Search.” (Image: Fire TV interface with the Search function highlighted).
(If not already done) Enable unknown apps: If you haven’t previously enabled installation of unknown apps on this Firestick, do so now. Go to Settings (gear icon) > My Fire TV > Developer Options > Apps from Unknown Sources, and turn it ON for Downloader. (Refer to the earlier Firestick section for detailed steps if needed.) This ensures you won’t get error messages when installing TiviMate’s APK.
(If you already enabled unknown sources in Part 1, you can skip Part 2. These steps are provided for completeness.)
On your FireStick remote, press the Home button to return to the home screen. Go to the Settings (gear icon on the far right)
Scroll down and select “My Fire TV.”
Choose “Developer Options.”

Find “Apps from Unknown Sources”. If it’s Off, click to turn it On (select “Enable” if a confirmation appears), This will allow the installation of the TiviMate app via Downloader.
Now your Firestick can install third-party APKs.
Now we need the actual app package (a ZIP file) to upload to the Roku.
https://www.firesticktricks.com/tivi and click “Go.”, (This is a reliable source link for the latest TiviMate APK; it will redirect to download the file,)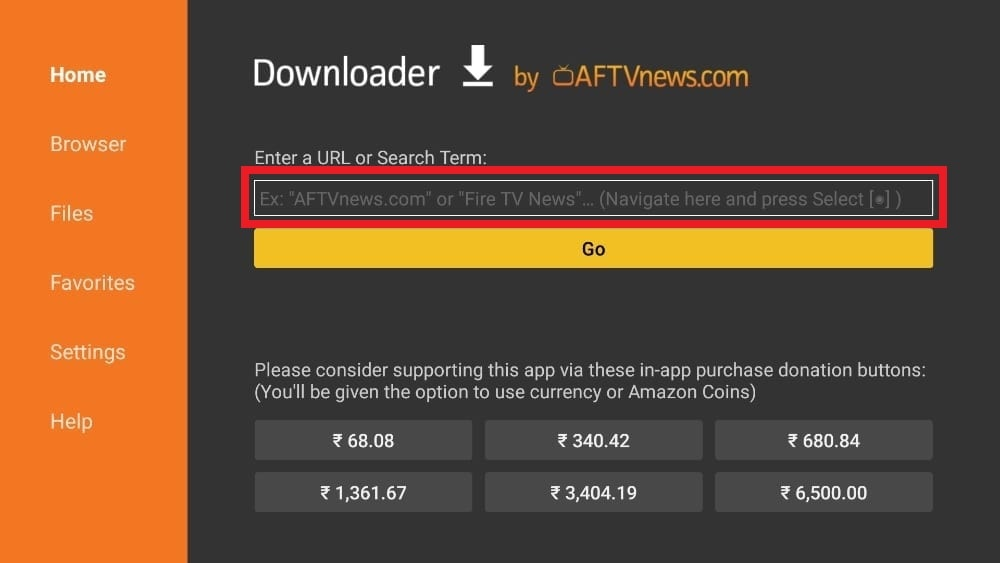
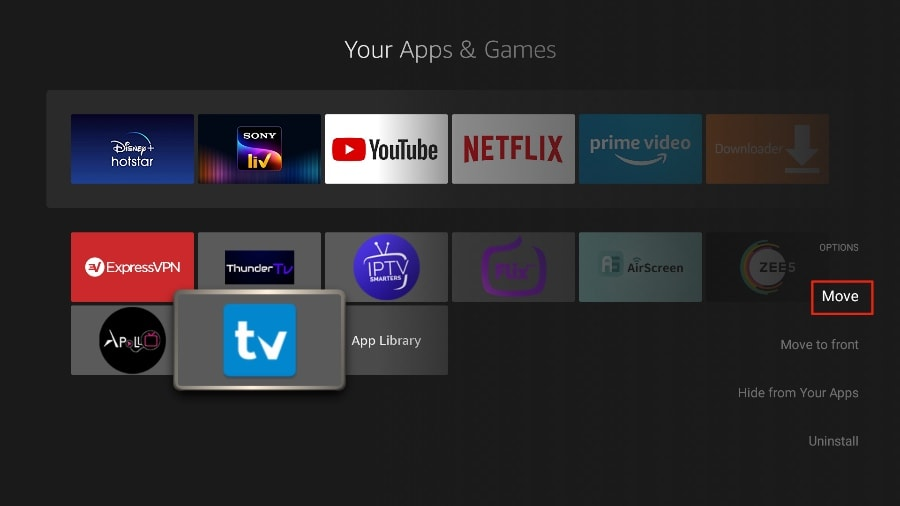
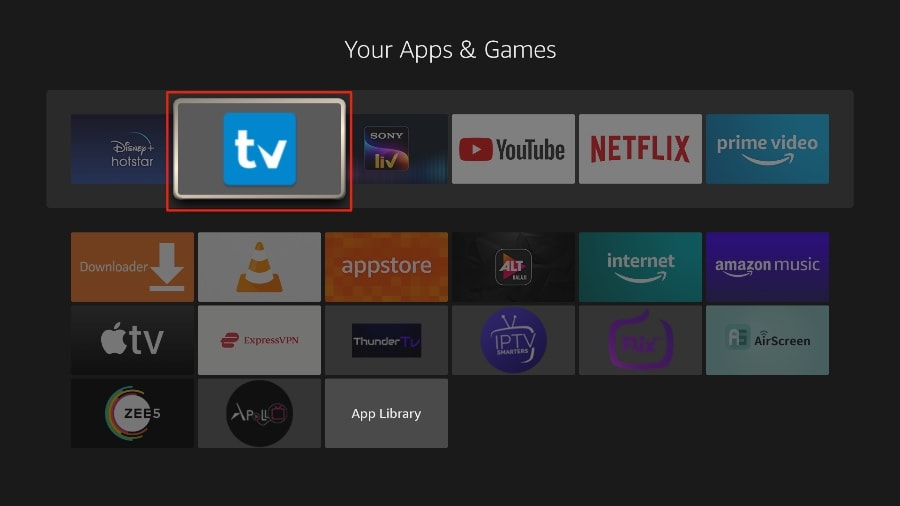
Pin TiviMate to Home Screen: Since you’ll likely use TiviMate often, you can make it easier to access:


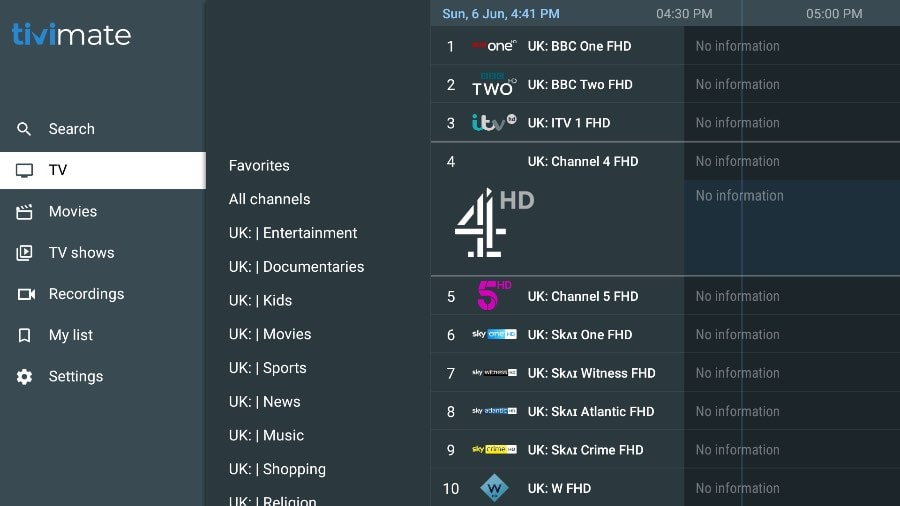
Now we’ll cover how to set up your IPTV service inside TiviMate.
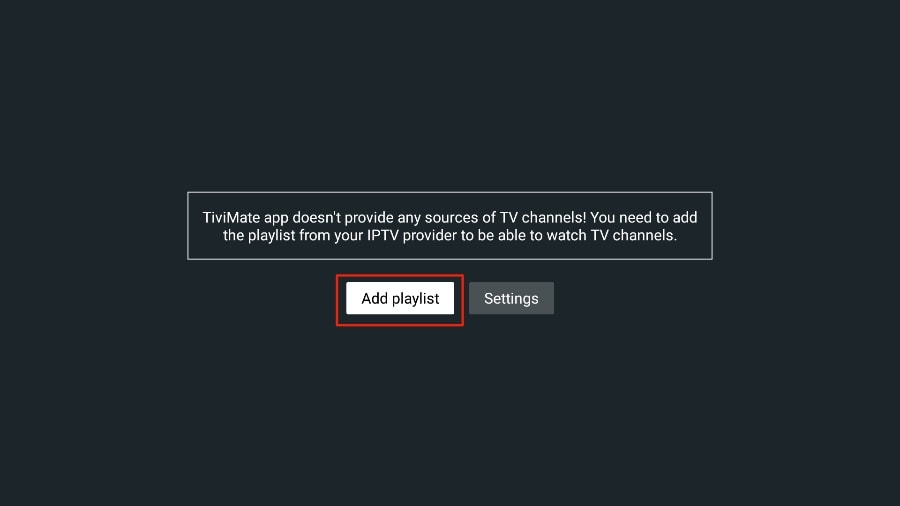
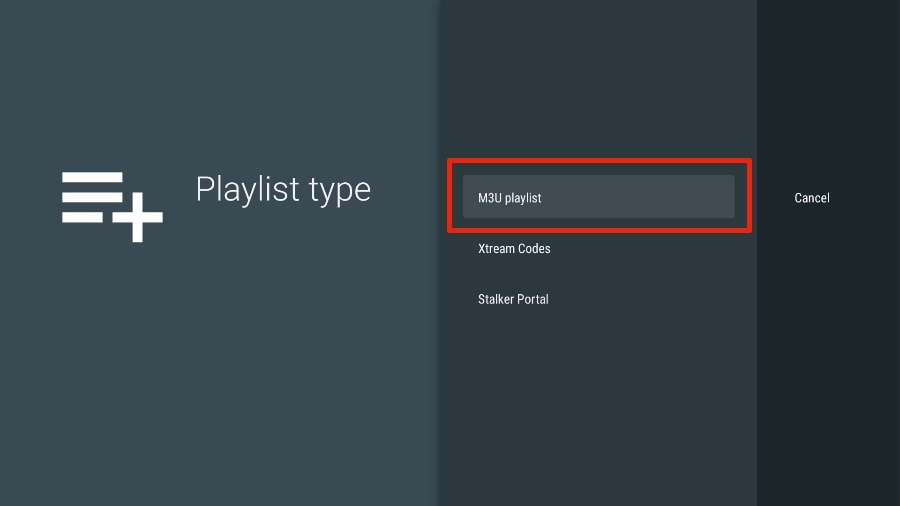
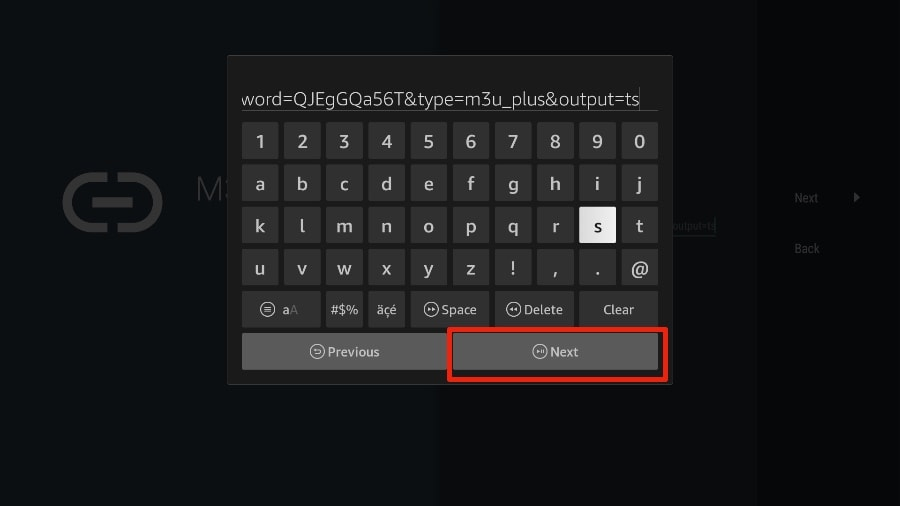
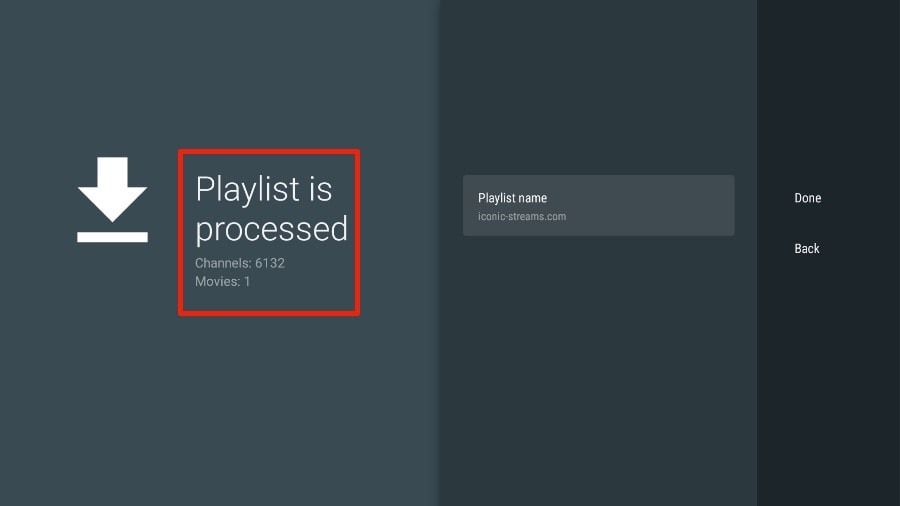
After installing TiviMate (on FireStick or any Android device), follow these steps to add your IPTV subscription:
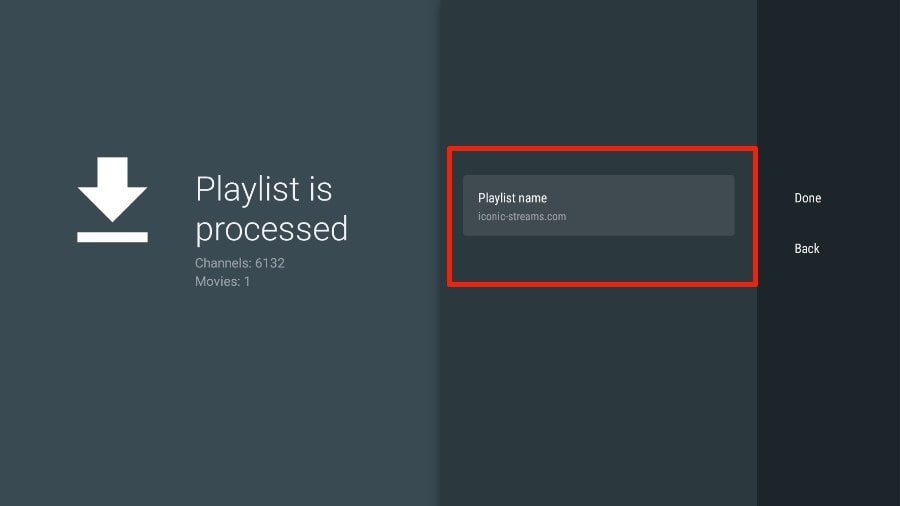
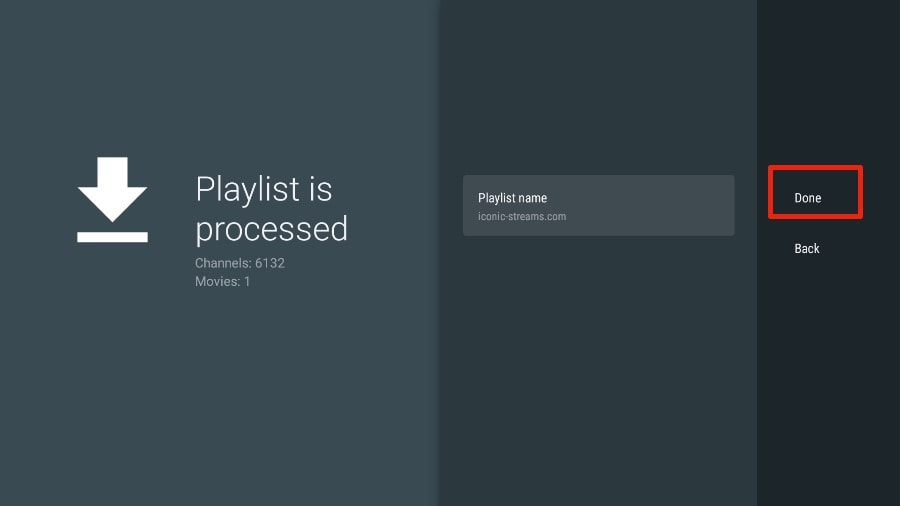
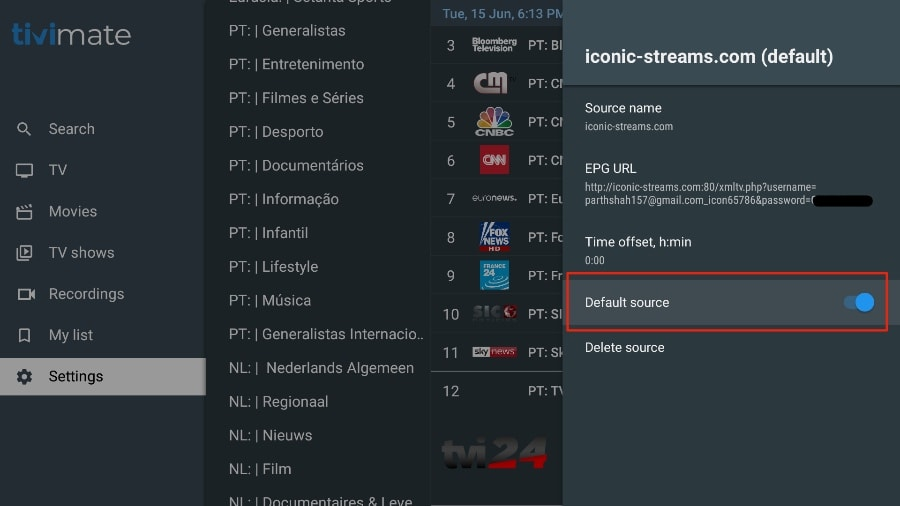
if you do not see the EPG (TV guide) data in TiviMate for our service, you may need to ensure it’s enabled. Go into TiviMate settings, find the EPG options, and make sure the EPG source for your playlist is active, Usually, TiviMate pulls the EPG automatically if it’s included, but double-check that “EPG sources” or “Update EPG” is turned on. Also, in the playlist settings, ensure the “Default EPG source” is set to the one provided by our service.
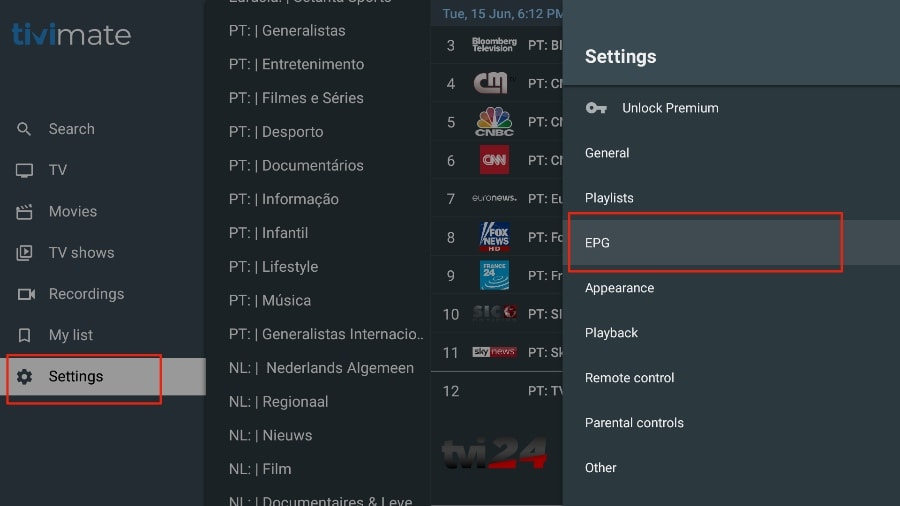
ensure the “Default EPG source” is set to the one provided by our service.
Using TiviMate Premium:
TiviMate’s base app is free to use, but some advanced features (like multiple playlists, favorites synchronization, etc.) require a premium subscription. Important: the TiviMate premium subscription is NOT included with our IPTV service – it’s a separate purchase from the app developer, If you try to use a premium-only feature without a premium account, TiviMate will prompt you to upgrade. For example, adding channels to favorites or setting recording schedules will trigger an upgrade message, ou can choose “Cancel” to continue using the free version with limited features, or if you want those features, you’ll need to buy the premium via the TiviMate Companion app from the Google Play Store, The cost is a small yearly fee and it unlocks all features on all your devices. Again, this is optional and up to you – TiviMate free will still let you watch all your channels, which is the main purpose.
You’ve reached the end of the user guide. We hope this comprehensive guide helps you set up PureHD IPTV on any device you own, hassle-free. If you have any questions or run into any difficulties during setup, remember that our support team is here to assist you. Now sit back, relax, and enjoy streaming with PureHD IPTV!

Pure HD Service provides next-generation IPTV with 4 K streams, weekly updates, and 24 / 7 VIP support. Our goal is excellence—continually upgrading servers and caring for every viewer so you can enjoy flawless entertainment anywhere.
© 2025 Pure HD Service. All rights reserved.